2 Temmuz 2017 Pazar

OpenCV Installation on Ubuntu 16.04 and Integration with Qt

OpenCV Installation on Ubuntu 16.04 and Integration with Qt 


Step 1: Download latest version of OpenCV (OpenCV 3.2.0 is downloaded for this installation)


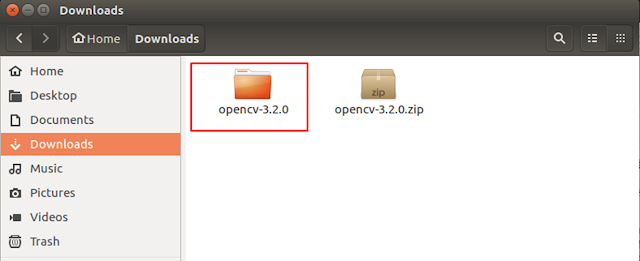
Step 2: "opencv-3.2.0" folder is extracted from downloaded "opencv-3.2.0.zip".


Step 3: Extracted folder contains sub-folders and files as seen following image. 2 folders named "source" and "build" are created and then all these sub-folders and files are cut and copied to the "source" folder. At this stage, "build" folder remains empty.


Step 4: If you do not have Cmake-GUI, you can install it using following code.

sudo apt install cmake-gui


Step 5: Open Cmake-GUI and define your "build" and "source" folders path like following image. Then click "Configure" button.


Step 6: After configuration done, select "WITH_QT" property "ON". 


Step 7: Click "Generate" button and wait until seeing "Generating done" message.


Note: You may encounter following error.


You can solve this issue writing following code.


sudo apt-get install qt5-default


Step 8: Open terminal and go to "build" folder and run following code to complete installation.


sudo make install


Step 9: In order to use your OpenCV libraries in Qt Creator, you only need to define OpenCV libraries path in the project (.pro) file as seen following image.


INCLUDEPATH += /home/eyyup/Downloads/opencv-3.2.0/build/include
LIBS += -L"/home/eyyup/Downloads/opencv-3.2.0/build/lib"
LIBS += -lopencv_calib3d
LIBS += -lopencv_core
LIBS += -lopencv_features2d
LIBS += -lopencv_flann
LIBS += -lopencv_highgui
LIBS += -lopencv_imgcodecs
LIBS += -lopencv_imgproc
LIBS += -lopencv_ml
LIBS += -lopencv_objdetect
LIBS += -lopencv_photo
LIBS += -lopencv_shape
LIBS += -lopencv_stitching
LIBS += -lopencv_superres
LIBS += -lopencv_video
LIBS += -lopencv_videoio
LIBS += -lopencv_videostab 


OpenCV'nin Ubuntu 16.04'e Kurulumu ve Qt ile Entegre Edilmesi

OpenCV'nin Ubuntu 16.04'e Kurulumu ve Qt ile Entegre Edilmesi


Adım 1: OpenCV'nin son versiyonu sitesinden indirilir (bu kurulum için OpenCV 3.2.0 versiyonu indirildi)


Adım 2: "opencv-3.2.0" klasörü indirilen "opencv-3.2.0.zip" klasöründen çıkarılır.


Adım 3: Çıkarılan klasör aşağıdaki resimde görüldüğü gibi alt klasör ve dosyalar içermektedir. "source" ve "build" adında 2 klasör oluşturulur ve sonra tüm bu alt klasör ve dosyalar kesilerek "source" klasörüne kopyalanır. Bu aşamada "build" klasörü boş bırakılır.


Adım 4: Eğer bilgisayarınızda Cmake-GUI yüklü değilse, aşağıdaki kodu yazarak yükleyebilirsiniz.


sudo apt install cmake-gui

Adım 5: Cmake-GUI'yi açın ve aşağıdaki resimdeki gibi "build" ve "source" klasörlerinin yolunu tanımlayınız. Sonra "Configure" tuşuna basınız.


Adım 6: Konfigürasyon tamamlandıktan sonra "WITH_QT" özelliğini aktif duruma getiriniz.


Adım 7: "Generate" tuşuna basınız ve "Generating done" mesajını görene kadar bekleyiniz. 


Not: Aşağıdaki gibi bir hatayla karşılaşabilirsiniz.


Bu hatayı gidermek için aşağıdaki kod parçası yazılır.

sudo apt-get install qt5-default

Adım 8: Kurulumu tamamlamak için "build" klasörü içerisinde terminal açılır ve aşağıdaki kod parçası yazılır.

sudo make install


Adım 9: Bu aşamaya kadar kurulumunuz hatasız olarak gerçekleştiyse OpenCV kütüphanesini Qt Creator'de kullanmak için yapmanız gereken tek şey proje dosyasında (.pro) OpenCV kütüphanelerinin olduğu yolu aşağıdaki resimde görüldüğü gibi tanımlamanız gerekmektedir.


INCLUDEPATH += /home/eyyup/Downloads/opencv-3.2.0/build/include
LIBS += -L"/home/eyyup/Downloads/opencv-3.2.0/build/lib"
LIBS += -lopencv_calib3d
LIBS += -lopencv_core
LIBS += -lopencv_features2d
LIBS += -lopencv_flann
LIBS += -lopencv_highgui
LIBS += -lopencv_imgcodecs
LIBS += -lopencv_imgproc
LIBS += -lopencv_ml
LIBS += -lopencv_objdetect
LIBS += -lopencv_photo
LIBS += -lopencv_shape
LIBS += -lopencv_stitching
LIBS += -lopencv_superres
LIBS += -lopencv_video
LIBS += -lopencv_videoio
LIBS += -lopencv_videostab

Adım 10: Qt'nin Ubuntu 16.04'e kurulumunu bu yayında bulabilirsiniz.


6 Nisan 2017 Perşembe

Facial Landmarks with Dlib , OpenCV, CPP (C++), Qt

Facial Landmarks with Dlib , OpenCV, CPP (C++), Qt


Step 1.  Click “New Project” button on Qt Creator

(Adım 1.  Qt Creator'de “New Project” butonuna tıklayınız) 


Step 2.  Choose “Qt Widgets Application”

(Adım 2.  Proje için “Qt Widgets Application” seçiniz)


Step 3.  Give a name to your project and define location to create your new project

(Adım 3. Projenize isim verin ve kaydedilecek dosyayı belirleyiniz)  


Step 4.  Select “kit” and click “Next” button

(Adım 4.  Derleyici seçiniz ve "Next" butonuna tıklayınız)


Step 5.  Select “QWidget” for your project and click “Next”

(Adım 5.  Proje için “QWidget” seçiniz ve "Next" butonuna tıklayınız)


Step 6.  “Finish” the creation of your new project

(Adım 6.  Projeyi oluşturmak için "Finish" butonuna tıklayınız)


Step 7.  Open project file (.pro), define your OpenCV and Dlib path and libraries.

(Adım 7.   Proje dosyasını (.pro) açınız, OpenCV ve Dlib kütüphanelerini ve bulundukları dizini tanımlayınız) 


Step 8.  Create GUI using two push button and one label in "widget.ui". One of push button is created to open webcam and other is created to close webcam. Label is used to show webcam stream. Check my previous post for detail information. 

(Adım 8. 2 tane push button ve bir tane label kullanılarak widget.ui 'de arayüz hazırlanır. Butonlardan bir tanesi kamerayı açmak için diğeri kapatmak için oluşturuldu. Label ise kamera görüntüsünü göstermek için oluşturuldu. Daha detaylı bilgi için önceki yazımı kontrol edebilirsiniz.) 


Step 9.  Import required libraries in  "widget.h"

(Adım 9. Gerekli kütüphaneleri "widget.h" başlık dosyasına ekleyiniz) 


Step 10. Download dlib's pre-trained facial landmark detector from here which will be used in the application. Check line 36 in widget.cpp.

(Adım 10. Uygulamada kullanılacak olan dlib kütüphanesinin önceden eğitilmiş yüz dedektörünü buradan indirebilirsiniz. widget.cpp'de 36. satırı kontrol ediniz.)


References


5 Nisan 2017 Çarşamba

Dlib Installation on Windows and Integration with Qt

Dlib Installation on Windows and Integration with Qt
How to install Dlib on Windows ?
How to integrate Dlib with Qt ?
(Dlib'in Windows'a Kurulumu ve Qt ile entegre edilmesi)


Step 1: Download latest version of Dlib (dlib ver. 19.4 is downloaded for this installation)

Adım 1: Dlib'in son versiyonu sitesinden indirilir (bu kurulum için dlib 19.4 versiyonu indirildi)


Step 2: Extract dlib-19.4.zip file to a desired location

Adım 2: dlib-19.4.zip dosyasını istediğiniz konuma çıkarın


dlib-19.4 folder contains following files and folders

dlib-19.4 klasörü aşağıdaki dosya ve klasörleri içerir


Step 3: Create an empty folder called "build" in the dlib-19.4 folder

Adım 3: dlib-19.4 klasörü içerisinde "build" adında boş bir klasör oluşturun


Step 4: Download CMake, check Step 4 in previous post and open CMake GUI

Adım 4: CMake'i indirin, önceki yazımdaki 4. adımı kontrol ediniz ve CMake arayüzünü açınız

Step 5: Define source code as "dlib-19.4/dlib" and define binaries as "dlib-19.4/build" and click configure

Adım 5: "dlib-19.4/dlib" ve "dlib-19.4/build" klasörleri "source code" ve "binaries" olarak tanımlanır ve configure tuşuna basılır


Step 6: Specify native compilers and select "gcc.exe" and "g++.exe" which is located in Qt folder

Adım 6: Yerel derleyiciler seçilir ve Qt klasörü içerisinde yer alan "gcc.exe" ve "g++" seçilir


Step 7: Click "Generate" button

Adım 7: "Generate" butonuna basılır


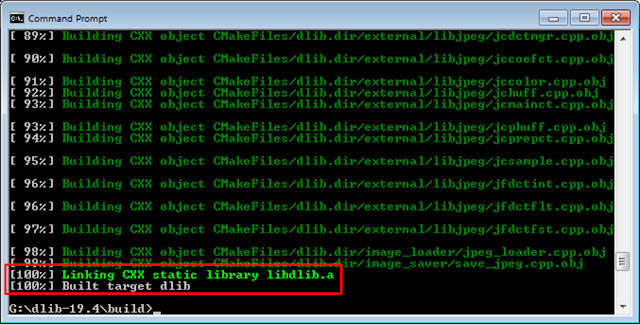
Step 8: Open "cmd" and go to dlib-19.4/build folder and write "mingw32-make"

Adım 8: "cmd" açılır, dlib-19.4/build klasörünün yer aldığı dizine gidilir ve "mingw32-make" komutu yazılır


Step 9: Create an empty folder called "include" in the dlib-19.4 folder and move "dlib" folder from dlib-19.4 to include

Adım 9: dlib-19.4 klasörü içerisinde "include" adında boş bir klasör oluşturun ve dlib-19.4 klasörü içerisinde yer alan dlib klasörünü yeni oluşturulan include klasörüne taşıyınız


Step 10: Open Qt, create new project and then open project file (.pro) and add dlib libraries

Adım 10: Qt açılır, yeni proje oluşturulur ve sonra .pro uzantılı proje dosyası açılır ve dlib kütüphaneleri eklenir


dlib installation and integration with Qt is completed successfully
dlib'in kurulumu ve Qt ile entegrasyonu başarılı bir şekilde tamamlandı